I'm going to explain step-by-step how to install trixbox in VirtualBox, this guide
assumes you have VirtualBox installed, if not, you can download it from here.
Virtual machine setup
- Grab the latest trixbox ISO from here, version 2.8.0.4 was latest at the time I wrote this tutorial.
- Start VirtualBox
- Click New

- You'll see this dialog, click next:

- In Name type trixbox, In OS Type select Operating System: Linux, Version: Red Hat
and click Next.
- 512MB of memory is more than enough, if you've low memory in your PC, even 256MB should suffice, click Next.

- Now, let's create a virtual hard drive for trixbox, click Next

- The following wizard will start, click Next.

- Make sure Dynamically expanding storage is checked, this way the disk will
expand on demand, this saves space.
- Pick a location into which you'd like to store the virtual disk file.
The size of 8.00GB should suffice, remember that it will not really take up
the whole 8.00GB since we've selected Dynamically Expanding Storage earlier.
After initial installation, trixbox virtual drive consumes around 1.8GB.
Click Next.
- Click Finish in the summary dialog:

- Click finish again in the Create New VM (Virtual Machine) summary dialog:


Configure VM
Now that we have created a virtual machine, we need to configure it in order to achieve the following goals:
- Make the VM boot from the trixbox ISO so we can install it.
- Make our the VM see our LAN so we'll be able to connect to it from
the Outside world.
Let's accomplish these:
- Open settings dialog by selecting trixbox and clicking Settings:

- From the left pane, select Storage and on the right under IDE Controller choose Empty and click the folder icon.

- In the Virtual Media Manager click Add and browse for trixbox ISO file you've downloaded earlier.

- After choosing the trixbox ISO, click Select.

- The steps above made that the ISO will appear as a bootable CD-ROM to the machine.
Now we need to make our machine visible in the network.
To do so, on the left pane click Network and then on the right choose
Attached to: Bridged Adapter and under Name choose your active network interface card, in my case I had to choose my Ralink WiFi card.
You can use ipconfig /all in cmd to determine which card is connected to the network according to it's IP in the network.
Close the settings dialog afterwards by clicking OK.


Installing trixbox
Now we're finally ready to install trixbox.
Before we start you may receive informative messages from VirtualBox regarding
the mouse being not active and the Host key being Right Control.
The host key (Right Ctrl) allows you to exit the VM and return to Windows.
If you have no mouse active in the VM use the Tab key to switch between
inputs and list boxes (more on that soon).
- Click Start:

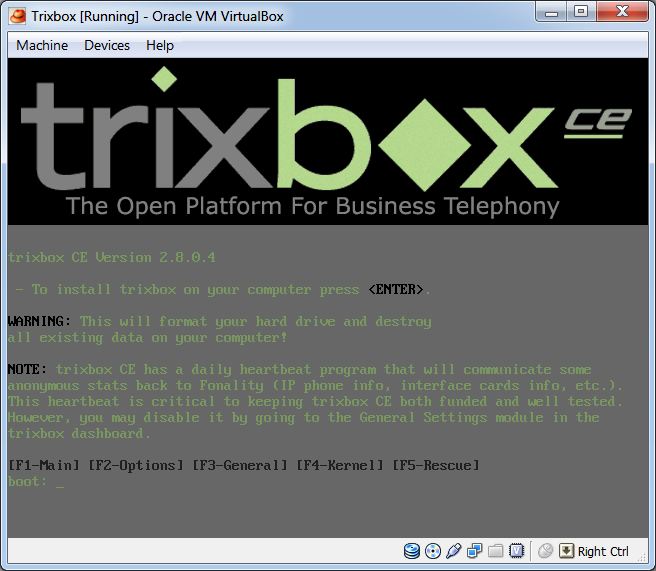
- In the boot screen hit Enter.

- Choose your keyboard layout, not really important in truth since we'll be
doing our configurations using a web browser, the keyboard layout is internally in
Linux.
To switch between Ok, Back and the list box use the Tab key.
Focus on OK and hit Enter when ready.
- Choose your time zone, again, to move between buttons use the Tab key,
focus on OK and hit Enter when ready to continue:
- Enter you root account password (Don't forget it!), focus on OK and hit Enter when done.

- Grab a beer while trixbox installs:

- The VM will reboot, now we need to remove the virtual CD-ROM or else we'll be stuck in an infinite setup loop, to do so go to the Devices Menu - remember to hit Right Ctrl if you're inside the VM to return keyboard and mouse focus to windows).
In the devices menu choose CD/DVD Devices and click Unmount CD/DVD Device.
- Now, reboot - go to the Machine menu and choose Reset:

- After reboot you'll see this startup screen, hit Enter:

- OK, now wait a couple of seconds until Trixbox boots, you should see the following
login screen:
***NOTE the IP might be different, in case
you don't see an IP but only http:// you may have not setup the network card correctly.
In that case, shut down the machine by choosing Machine>ACPI Shutdown, go to
Settings, there go to Network and switch the network interface card to another one.
Start the machine again and see if you get an IP address.



End of part II
I hope this tutorial has been useful to you. In the next one we'll be configuring
trixbox and testing it with a free softphone, called X-lite, to see if networking
works.
